Шаг 1: Оплата
Убедитесь, что вы подписались на Galt VPN через наш сайт.
Шаг 2: Войдите в свой аккаунт
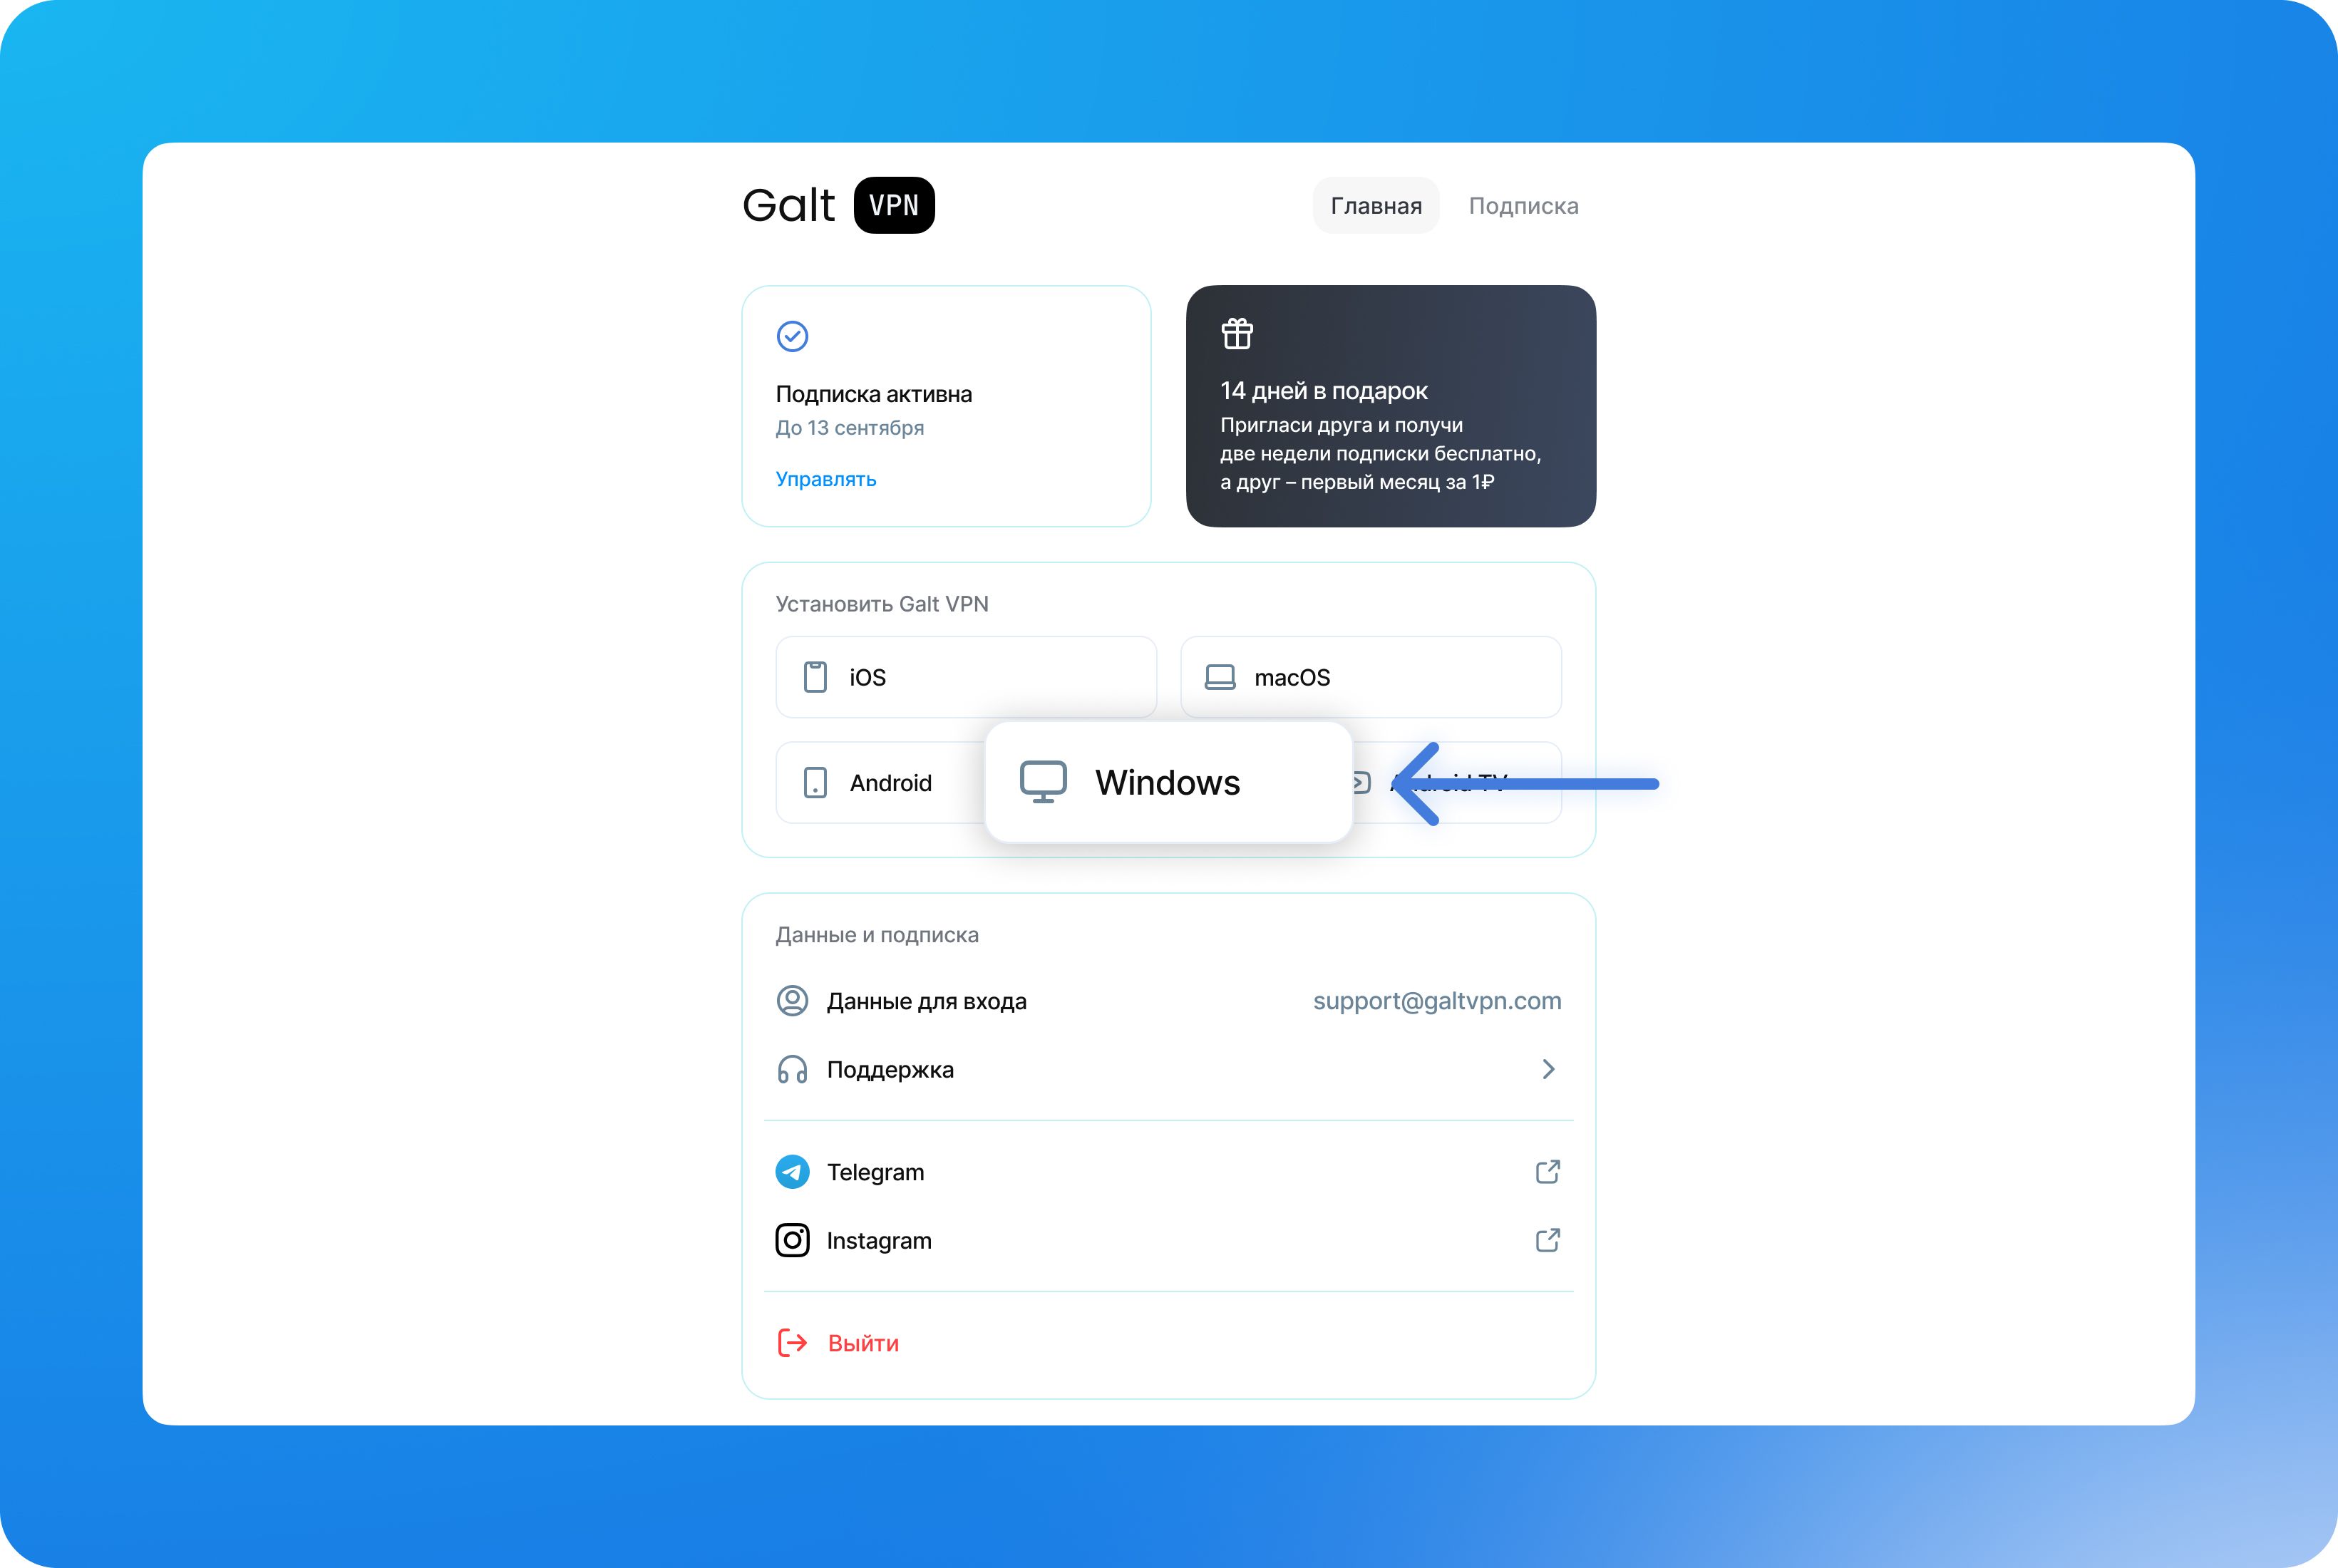
После входа на наш сайт вы будете сразу перенаправлены на свою панель управления. В панели управления найдите раздел "Установка" и нажмите на "Windows".

Шаг 3: Скачайте приложение
Вы должны увидеть следующий экран. Чтобы начать процесс, загрузите приложение Hiddify на свой компьютер с Windows. Вы можете выбрать прямую загрузку или загрузку из Microsoft Store.

Откройте приложение Hiddify на вашем компьютере с Windows, завершите установку и начальную настройку, выбрав предпочитаемый язык и нажав "Продолжить".

Шаг 4: Получите свой профиль VPN
Вернитесь к вашему веб-браузеру на компьютере с Windows. Вы должны увидеть экран выбора региона. Выберите предпочитаемое место расположения VPN. Появится кнопка «Продолжить и скопировать» — нажмите на нее, чтобы продолжить.


Шаг 5: Настройте VPN
На вашем компьютере с Windows вернитесь в приложение Hiddify и нажмите «Новый профиль», чтобы продолжить.

Затем нажмите "Импортировать из буфера обмена."

Если все пройдет успешно, вы будете перенаправлены на главный экран.
Шаг 6: Подключите VPN
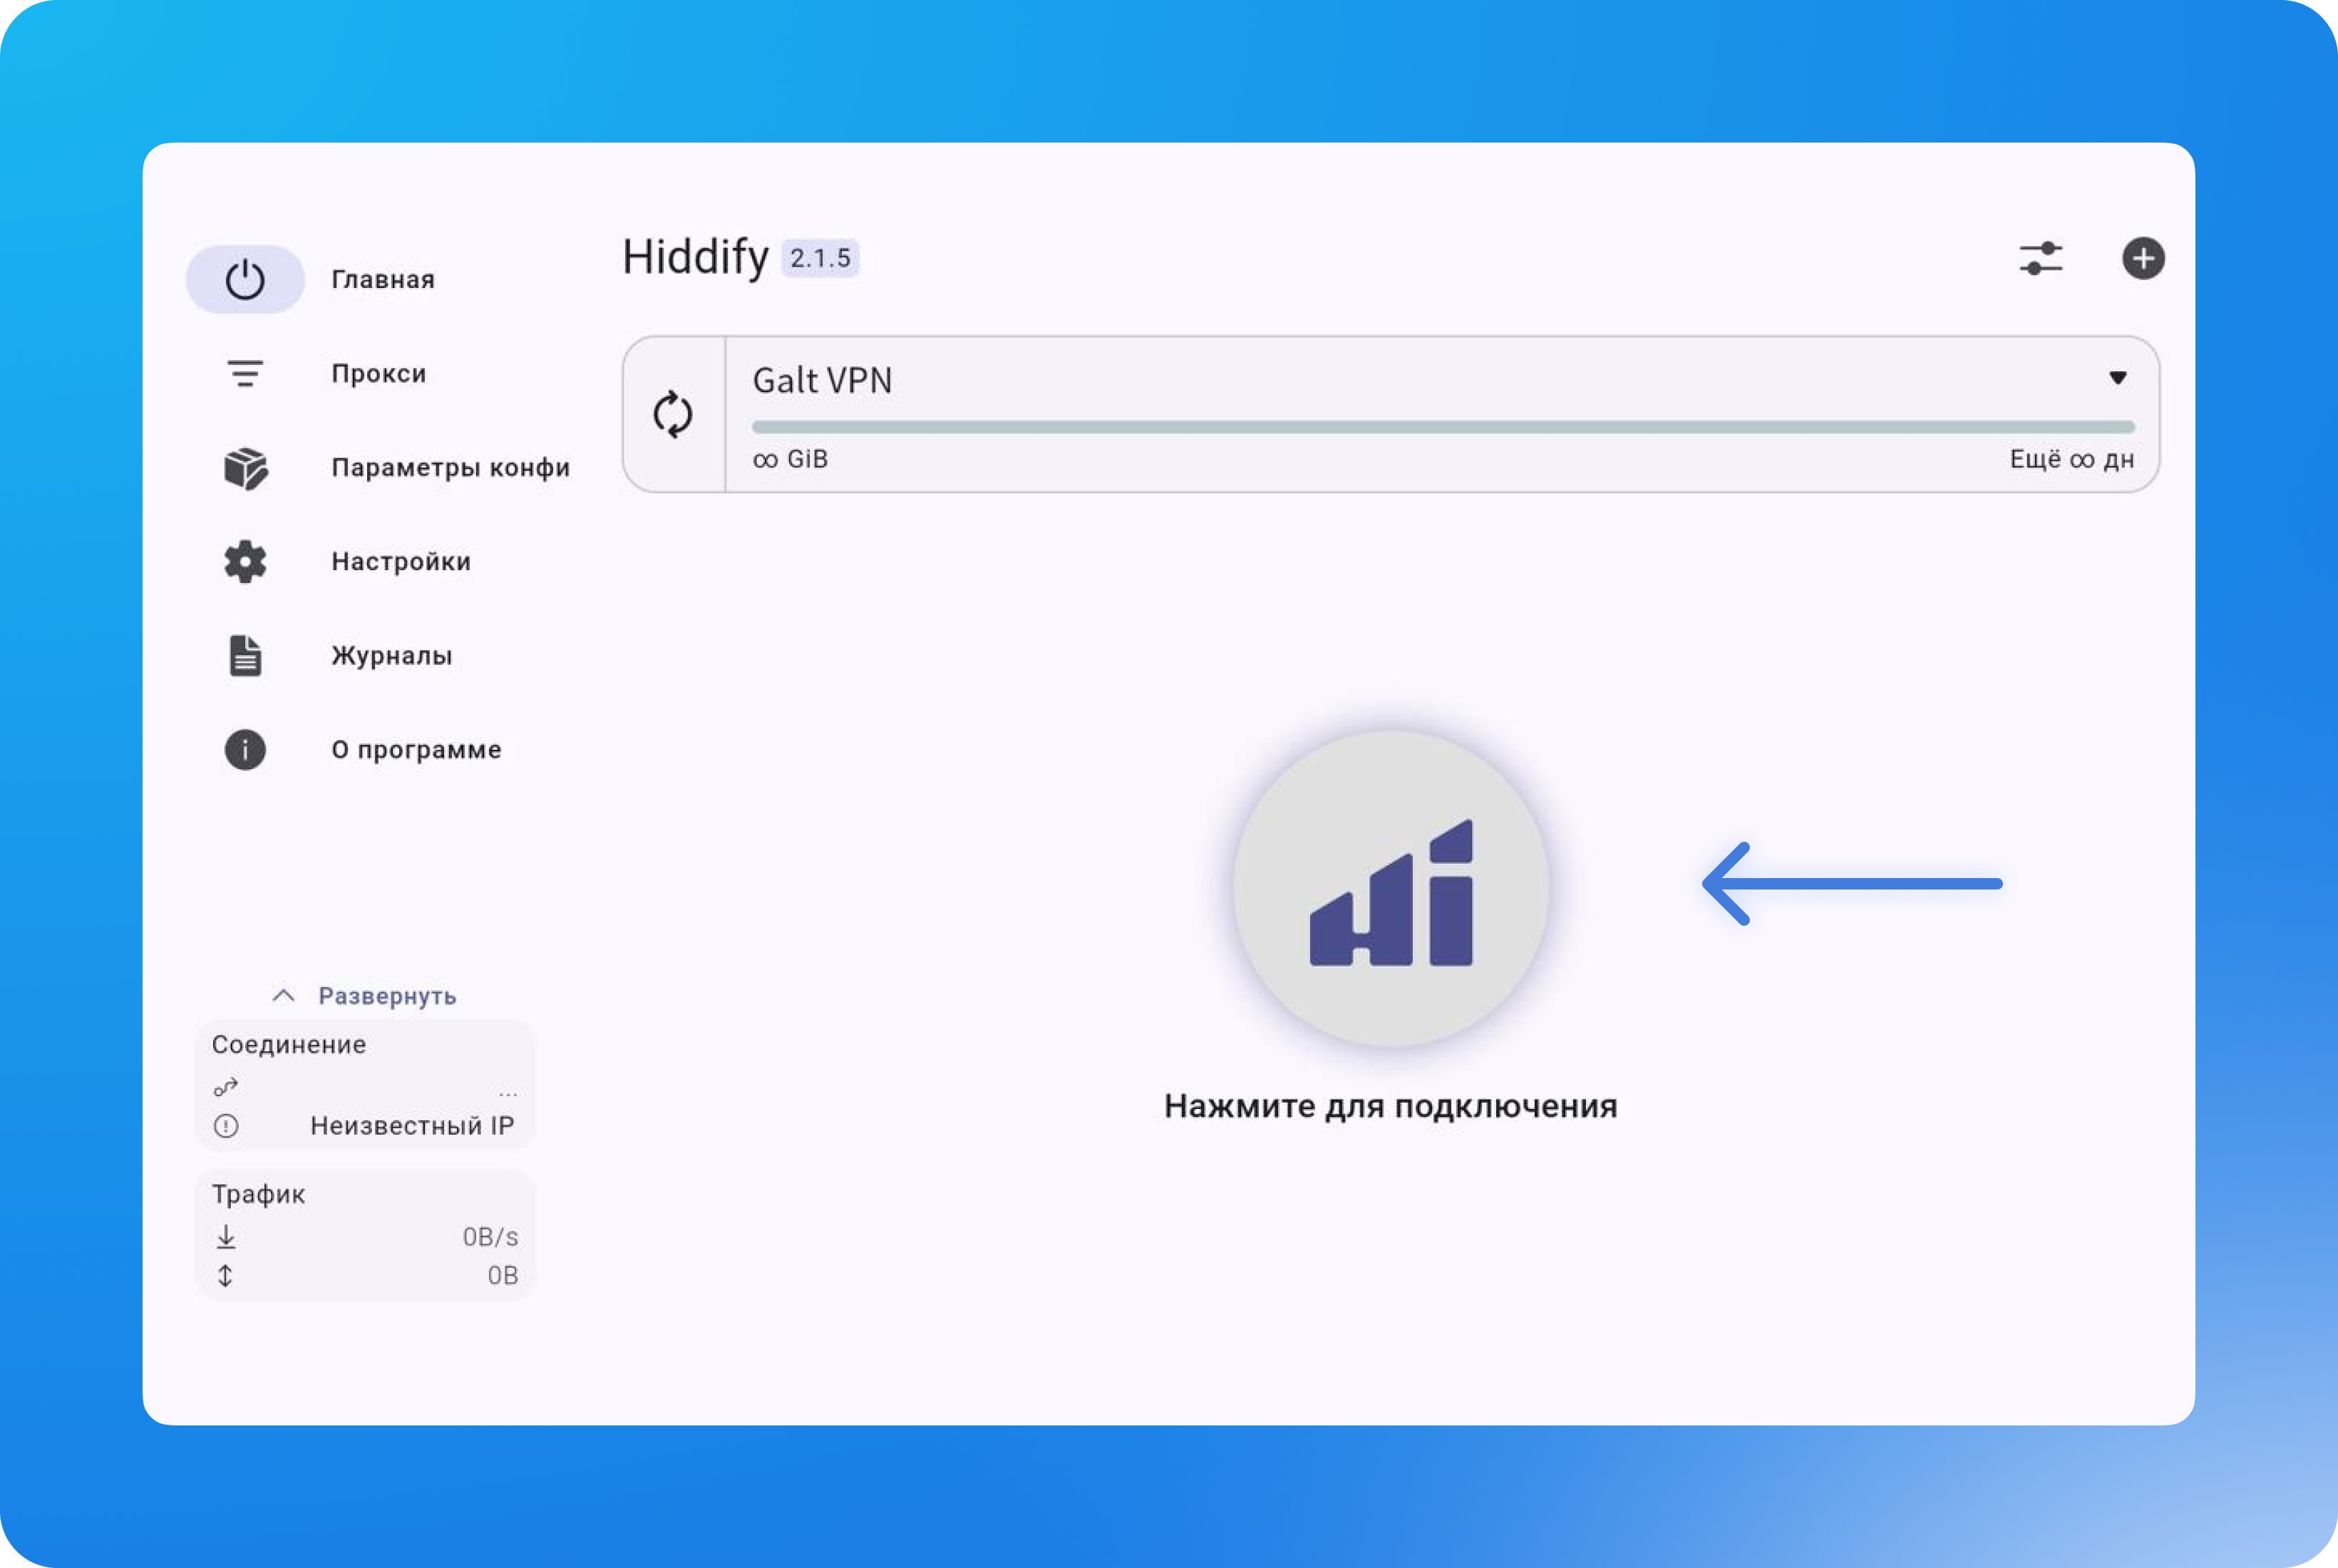
Теперь, когда всё установлено, просто нажмите на основную круглую кнопку для подключения. После подключения вы сможете наслаждаться преимуществами VPN на вашем компьютере с Windows.


Чтобы отключиться, просто нажмите кнопку снова.